
Contents
I documented removing the handlebars, headlight shell fenders and front wheel here:
Removing the fork tubes is covered here:
This page covers removing the steering stem, bearings and races and replacing them.
Parts
Here are the part’s I needed. The Triple Tree Seal Ring is often damaged when removing the lower bearing race, and in my case, it was missing. I replaced the Chrome Cap as the chrome on original was in sad shape with chrome plating flaking off.
| Part # | Description |
| 07 11 9 985 070 | Steering head bearing, top & bottom |
| 31 42 1 234 509 | Triple Tree Seal Ring (aka, Lower Dust Cap) |
| 31 42 2 000 312 | Chrome Dust Cap |
I got new bearings, races and the lower dust cap from Cycle Works and the upper chrome dust cap from BMW of Denver.
Tools
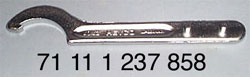
I use the hook spanner tool in the bike’s tool kit.
-

BMW Hook Spanner and Pin Wrench (Source: Hucky’s Spare Parts)
I use a steering head bearing puller from BMW that I borrowed from a BMW mechanic.
BMW Steering Head Race Puller
You can also get one from Cycle Works (Cycle Works Steering Stem Bearing Puller).
Cycle Works Steering Stem Bearing Tool-Outer Race Puller Plate Parts
Cycle Works Steering Stem Bearing Tool-Outer Bearing Race Installation Tool Parts
Remove Steering Stem
This is where I started from. At this point, the steering stem is still connected to the steering head with the slotted nut as shown below.
Steering Head After Forks Removed
Remove the slotted nut with the hook spanner tool in the bike’s tool kit.
-
BMW Hook Spanner and Pin Wrench
The chrome dust cap lifts off to expose the top steering head bearing.
Using a rubber mallet, knock the steering stem out of the steering head. The upper bearing is a shrink fit onto the stem and will slide up the stem, but it takes a couple of firm blows to get it to slide. Keep your hand under the steering stem to catch it so it doesn’t slam into the floor.
Here’s the steering stem after removing it from the steering head. I put the top bearing back on the stem and you can see the shiny band on the stem underneath which is where it seats on the stem. Also you can see the bottom bearing and race attached to the steering stem.
Steering Stem Showing Top Bearing
Inspect Steering Stem Bearings
This shows the Brinelling marks in the upper race. This is caused by the tapered roller bearing pounding into the race and the fact the roller bearing never rotates very much. Over time, the race gets dented. You feel this as notchy steering when moving the handlebars either side of center.
Upper Race Showing Brinelling
BMW Steering Head Bearing Puller Assembly
I borrowed the BMW bearing puller from Clem at BMW of Denver who loaned it from his personal stash of tools. It is a “Beast”, that’s for sure.
BMW Steering Head Race puller
The puller has two threaded rods; an inner one attached to the jaws and an outer threaded rod that holds the puller arms and has a hex nut for a crescent wrench at the top.
The ring goes on top of the steering head.
Puller Ring
Puller Ring in Place on Top of Steering Stem
The jaws of the puller use the inner threaded rod to push the wedge in between the jaws so the lip of the jaws is driven underneath the race.
Race Puller Jaws
Remove Steering Stem Bearing Races
Turn the jaw assembly on the inner rod raising it and spreading the jaws until they are firmly under the race. Then tighten the lower nut to secure the jaws. This is cumbersome as the puller has a lot of moving parts and the outer arms get in the way. I folded them over the top of the puller to keep them out of the way.
Race Puller Lower Nut Spreads Jaws
This shows the jaws spread underneath the race. After tightening the lower nut to secure the jaws, turn the outer threaded rod to bring the outer arms down until they rest on top of the ring being careful they don’t cover the edge of the race. Tighten the outer rod enough to snug the outer arms down on the ring. Again, this is cumbersome with so many moving parts.
Race Puller Jaws Under the Race
The outer threaded rod has a hex nut for a crescent wrench. Use a crescent wrench to turn the nut to pull the rod and the race out of the steering head. It will take a good deal of force to get the race to start moving.
Upper Steering Head Race Removed
Here is a better view of Brinelling on the inside of the top race.
Top Race with Vertical Bands Indicating Brinelling
To remove the lower bearing, I used a Dremel tool with a cutoff wheel and cut through the cage to remove the bearing cage and the bearings. The bearing is a shrink fit onto a wide area at the bottom of the steering stem. I used the Dremel cutoff wheel to cut notches in the bearing shell and then used a cold chisel and a hammer to crack the shell. I drove the chisel downward near the outer edge of the shell to crack it. I was careful to avoid scoring the steering stem.
Another technique is to use a propane torch and heat the shell to a dull red and then use a hammer and chisel on the outside edge of the shell to drive the shell up the stem.
Here is the lower race after I removed it.
Lower Race and Dremel Cuts
Installing the New Bearings and Races
The bottom bearing has to slide over the upper bearing land and the lower land until it seats at the bottom of the stem. The technique I use is to freeze the steering stem and heat the bearing. But before I did that, I cleaned and polished the aluminum lower triple clamp making sure there are no nicks or gouges in the lands where the bearings seat.
Here’s the parts for the bottom bearing including the new lower dust cap.
Bottom Bearing Parts-Dust Cover, Bearing & Race
I decided to have an insurance policy to ensure I got the lower bearing to seat. I took the old race to cover the bearing and the Cycle Works swing arm puller metal tube. I could slide the tube over the stem so it was on top of the old race. I figured I could hammer on the top of the tube to drive the bearing all the way to the bottom of the stem if it hung up and I wouldn’t damage the bearing.
Insurance-Old Race and New Lower Bearing
Insurance-Cycle Works Swing Arm Puller Tube
I took the steering stem out of the freezer and slide the bottom dust cap on.
Bottom Dust Cover on Frozen Steering Stem
I heated the bearing with a heat gun until it was about 220 degrees F as verified with my handheld infrared thermometer. Using welding gloves, I picked up the bearing and put it on the stem and it dropped all the way to the bottom. No insurance required 🙂
Bottom Bearing Slipped On and Seated on the Steering Stem
I put the top and bottom races in the freezer for an hour to shrink them a little before driving them into the steering head.
Top Race Ready to Drive into Steering Head
I put the flat side of the the Cycle Works swing arm puller aluminum block on top of the race and hammered it into the top of the steering head until it was seated and flush with the top of the head. You can hear a change in tone when it is seated.
Top Race Installed Flush with Top of Steering Head
Since I stripped the bike to the frame, I could turn the frame over to drive in the lower race. I put the top of the steering stem on a board, centered the frozen race in the hole and with the flat side of the aluminum block on top, drove it in until it was flush with the bottom of the steering head. The lower race is recessed into the steering head. I had read that the old race can be put upside down on the new race and then hammered in to seat the lower race. I was concerned that I wouldn’t be able to get the old race out, but it was easy to wiggle loose. And, I could have used a screw driver under the inner lip to rock it out.
Using Old Race to Driver Bottom Race into Steering Head
Bottom Race Seated Below Bottom of Steering Head
Install Steering Stem in Steering Head
The upper bearing is seated on the land at the top of the stem by tightening the ringed nut until it seats. Here is the order of the top bearing parts, top to bottom, lower to upper.
Top Bearing Parts in Order, Back to Front, Bottom to Top
The bearings need to be packed with grease, and I use NLGP2 EP red grease.
NLG2 EP Red Grease
Here are the packed top and bottom bearings.
Top & Bottom Bearings Packed with Grease
Insert the steering stem into the bottom of the steering head.
Steering Stem Installed in Steering Head
Which Side Goes Up?
The slotted nut has a wide face and a narrow face. So, which face goes up? The wide face does. Here is the incorrect direction;
Slotted Nut-INCORRECT Orientation
And, here is the correct orientation.
Slotted Nut-CORRECT Orientation
Put the top bearing on the stem and hand tighten the slotted nut on the stem. The bearing will sit high on the stem until it is seated.
Top Bearing on Stem-Needs to Be Seated on Stem
Tighten the slotted nut using the ring spanner from the tool kit until it is tight. This will drive the top bearing down on the stem until it is seated.
Top Bearing Pulled Snug & Seated in Race
Then remove the slotted nut, put the top chrome dust cover on and tighten the slotted nut again until snug. After I install the forks, I’ll adjust the bearing pre-load.
This is a milestone on the project as this is the first time I installed parts back on the frame. 🙂
Slotted Nut (Correct Orientation) and New Chrome Top Dust Cover
Revisions
2017-04-04 Update organization and Table of Contents. Add Cycle Works tools.
2020-01-08 Broken picture link, typos.
Awesome work and documentation. Wish I’d have seen this before I serviced my headset bearing last month. I would have had the confidence to do the full replacement like you did. Looking forward to seeing more as your project progresses.
The bike is going to be amazing!
Hi Marty,
Thanks for stopping by. BTW, there is always a next time with bearings, so I hope this material comes in handy then 😉
Thanks for the good wishes. It was rewarding to finally see parts going back on instead of the opposite for the past several months.
Best.
Brook.
Great documentation which helps so many of us doing same projects around the world! I am restoring a ’76 R75/6 w/Earls retrofit and looking for dual disc forks for my R100/7/w sidecar. Had dinner w/Duane Asherman last week and think you should collaborate, your photos w/his narratives into restoration manual!
Email him as we discussed how best to preserve his years of documentation with much more not on his website!
Larry@monterey, CA.j
Hi Larry,
Thanks for the compliments. I sent you a separate note.
Best.
Brook.
Your lock nut is upside down fella!
the lock but goes on bevel side down
Gale and Spokenoise,
Ah, good eye. I must confess, when I read Spokenoise’s comment I did glance down to check my zipper, just in case your comment was a bit more personal 😉
Note that this recent article in Motorcycle Classics magazine about servicing the steering head bearings on a BMW R75/5 also shows installing the slotted nut with the small diameter on top (look toward the end of the article). And if you look real close at an earlier photo of removing the slotted nut, it’s in the correct orientation; larger diameter face pointing up.
http://www.motorcycleclassics.com/mc-how-to/bmw-5-steering-head-bearing-service.aspx
The good news is, this is easy to fix and I’ll flip the nut over when I do the final pre-load adjustment. I added a paragraph with pictures showing “incorrect” and “correct” orientation of the slotted nut.
Thanks for stopping bye and sharing your knowledge.
Best.
Brook.
The MotorcycleClassics articles on BMWs each have multiple errors. Then nut orientation has been mentioned, but so too is not properly packing the lower bearing with grease BEFORE installation. These are steel bearings on a steel tube and in a steel frame — no heating nor freezing is needed nor prudent. They are a simple press out/off job with the appropriate pullers (what’s shown is fine), but also for pressing on. Inverting the old inner race sans cage and section of pipe, all-thread and some commonly available nuts and washers will make quick work sans hammers while avoiding a race getting cockeyed or nicked. It only takes a little more grease and time to fully pack the bearings and races to exclude all air pockets, seal out water (vapor too, think fog, dew), and leave some reserve to “drain down” over time. Grease can get slung around/off after the bike’s sat in the sun considering all the jarring motions the headstock sees while riding, as evidenced in part by the brinneling lines in the old races.
Hi Joe,
Thanks for coming by and providing your experience.
Best.
Brook.
How’d you clean up the aluminum on the stearing head?
Hi Ben,
Thanks for coming by.
I cleaned them in a parts washer, then I used AutoSol Aluminum Cleaner with a scotch brite pad to get the crud off. I used some more Aluminum cleaner with steel wool (000). I finished up with AutoSol Aluminum polish.
You can find these at autosol.com.
https://autosol.com/shop/aluminum-cleaner/
https://autosol.com/shop/aluminum-polish/
They also make a protective Aluminum Oil that I like on cast parts.
https://autosol.com/shop/aluminum-protective-oil/
Best.
Brook.
Pingback: 1973 BMW R75/5 Rebuild: Replacing Steering Head Bearings | Motorcycles & Other Musings
Brook,
Appreciation for your clear text and pictures in treating our old airheads. I am greasing my steering head bearings and knew “for sure” that the top slotted nut went on wide-side-up. Then doubts set in as narrow-side-up looks like the way it should be. Your site gave the clear, graphic proof of the official way. Typical thoroughness in showing the wrong way, then the right way. But I probably won’t get a good night’s sleep until I find out why BMW did it this way. Come Monday I am going to call the factory in Berlin or wherever to get the “true facts.”
Brian
Hi Brian,
I’m glad the pictures of this detail helped confirm the proper orientation of the steering stem nut.
The reason it’s the small end of the stem nut that goes against the bearing and the wide end that faces the rider is because this nut presses on the inner ring of the bearing race so proper tension is applied to the bearings. It must press on the inner ring of the race so as not to deform the bearings in the race.
Best.
Brook.
Like many, I’m puzzled by the orientation of that locknut as described. Being a locknut, I would have thought the aim is to have as much purchase as possible on the surface it locks against. That is, wide side down.
It reminds me of the old argument that skinny tyres are best because the downward force exerted through a small contact area give best road adhesion. Of course no one races Indy on bicycle tyres any more because the theory is wrong. Could the factory have had it wrong too?
Thanks again for sharing so carefully.
Chris
Hi Chris,
Thanks for coming by and reading this write-up.
The key function of this nut is to provide the proper pre-load for the top and bottom tapered roller bearings in the steering stem. To do that, the force applied to the top tapered roller bearing has to be applied to the center collar of the bearing and NOT to the outer rim of the bearing cage. So, the nut has a smaller diameter on one side that presses only on the center collar to avoid putting that pressure on the outer rim of the bearing cage. The top tapered roller bearing is captive on the steering stem so as it is forced down by the nut, the load is also transferred by the steering stem to the bottom bearing so both bearings are pre-loaded. The top of the nut is wider so it matches the diameter of the steering stem acorn nut that sits on top of it. The acorn nut locks the top plate to the steering stem and centers the plate in relation to the fork tubes.
As an aside, the top plate is a weak point in the design as it’s too flimsy to be up to the task. There are after-market top clamps made, Toaster Tan comes to mind, that are very stiff and they improve the handling since they limit flexing of the top plate and the associated bending of the top of the fork tubes. The forces here are quite large when cornering or under full braking. If the top plate gets bent, not uncommon, then the fork tubes aren’t parallel and this results in increased stiction in the forks and a harsher ride. I strive for 0.001-0.002 difference in fork tube separation when I install them so they are compliant and operate with minimum stiction.
I hope this helps.
Best.
Brook.
Hi Brook –
Me again. I have a question about diagnosing the need to replace the steering head bearings. I guess I should add that I bought the bike (’72 R75) 15 years ago with 11k km on the odometer which in reality was probably 111k (or maybe 211k) based on wear of some other components. I’ve added only about another 25k since then. Unfortunately I know little to nothing of its service history.
I now have the front forks disassembled to the point of the fork tubes are still in the yoke (sliders and dampers removed) and the steering head is still intact. When I manually rotate the steering assembly, holding the turn directional signals (handlebars and control cables also removed), there is a barely detectable notching effect at 0 degrees but it doesn’t seem very bad to me. I don’t know if maybe the bearings had already been replaced at some point in its first 30 years pre-me.
How do you know if the bearings need to be replaced? How bad is bad? What are the consequences of not replacing them? With the amount of special tooling required I would rather not replace them if not necessary. Thanks for your input.
– Dave W.
Hi Dave,
Sometimes the grease gets hard and that causes the steering to feel a bit notchy. At a minimum, I would remove the steering stem (easy to do) and clean and grease the top and bottom bearing.
With the inner bearings removed, I would inspect the outer races for vertical dark lines. If these are very pronounced, then this is a sign of the outer race “brinneling” which is to say, they have been pounded enough by the rollers in the inner races to deform the outer race. Hence, the steering feels notchy because there are notches in the outer races.
In any event, after you grease the original bearings, assemble the steering head and tighten the bearings to a reasonable amount of preload. If they still feel as notchy, then likely the bearing races are notched and will need to be replaced.
I hope that helps.
Best.
Brook.
Thanks Brook. Very helpful advice. I took your suggestion – disassembled the steering head, cleaned the bearings (the grease was somewhat hardened and dirty), regreased and reassembled. The outer races did have some faint lines, but maybe not as pronounced as in your pics. I tightened the preload nut and do not feel any notchiness.
Dave,
Cool beans. Glad it was just hardened grease. Now, get some riding in 🙂
Best.
Brook.
Is there another tool to tighten the slotted nut. The one that came with my bike doesn’t seem to fit and always slides off. Its starting to gouge the nut