CO-ABC Tech Class on Spline Lube and Swing Arm Bearing Replacement

I’ve been hosting tech classes for the Colorado Airhead Beemers Club using my small workshop, affectionately called “Brook’s Airhead Garage”. If you live in Colorado and want to join our Down To Meet group, click here and join.

–> Colorado Airheads Beemer Club (CO-ABC) Down to Meet Site

It is a way to help disseminate knowledge about the care and feeding of these 40+ year old motorcycles. I’m hopeful that the more our members know, the more inclined they will be to do their own work, and the longer these motorcycles will keep running.

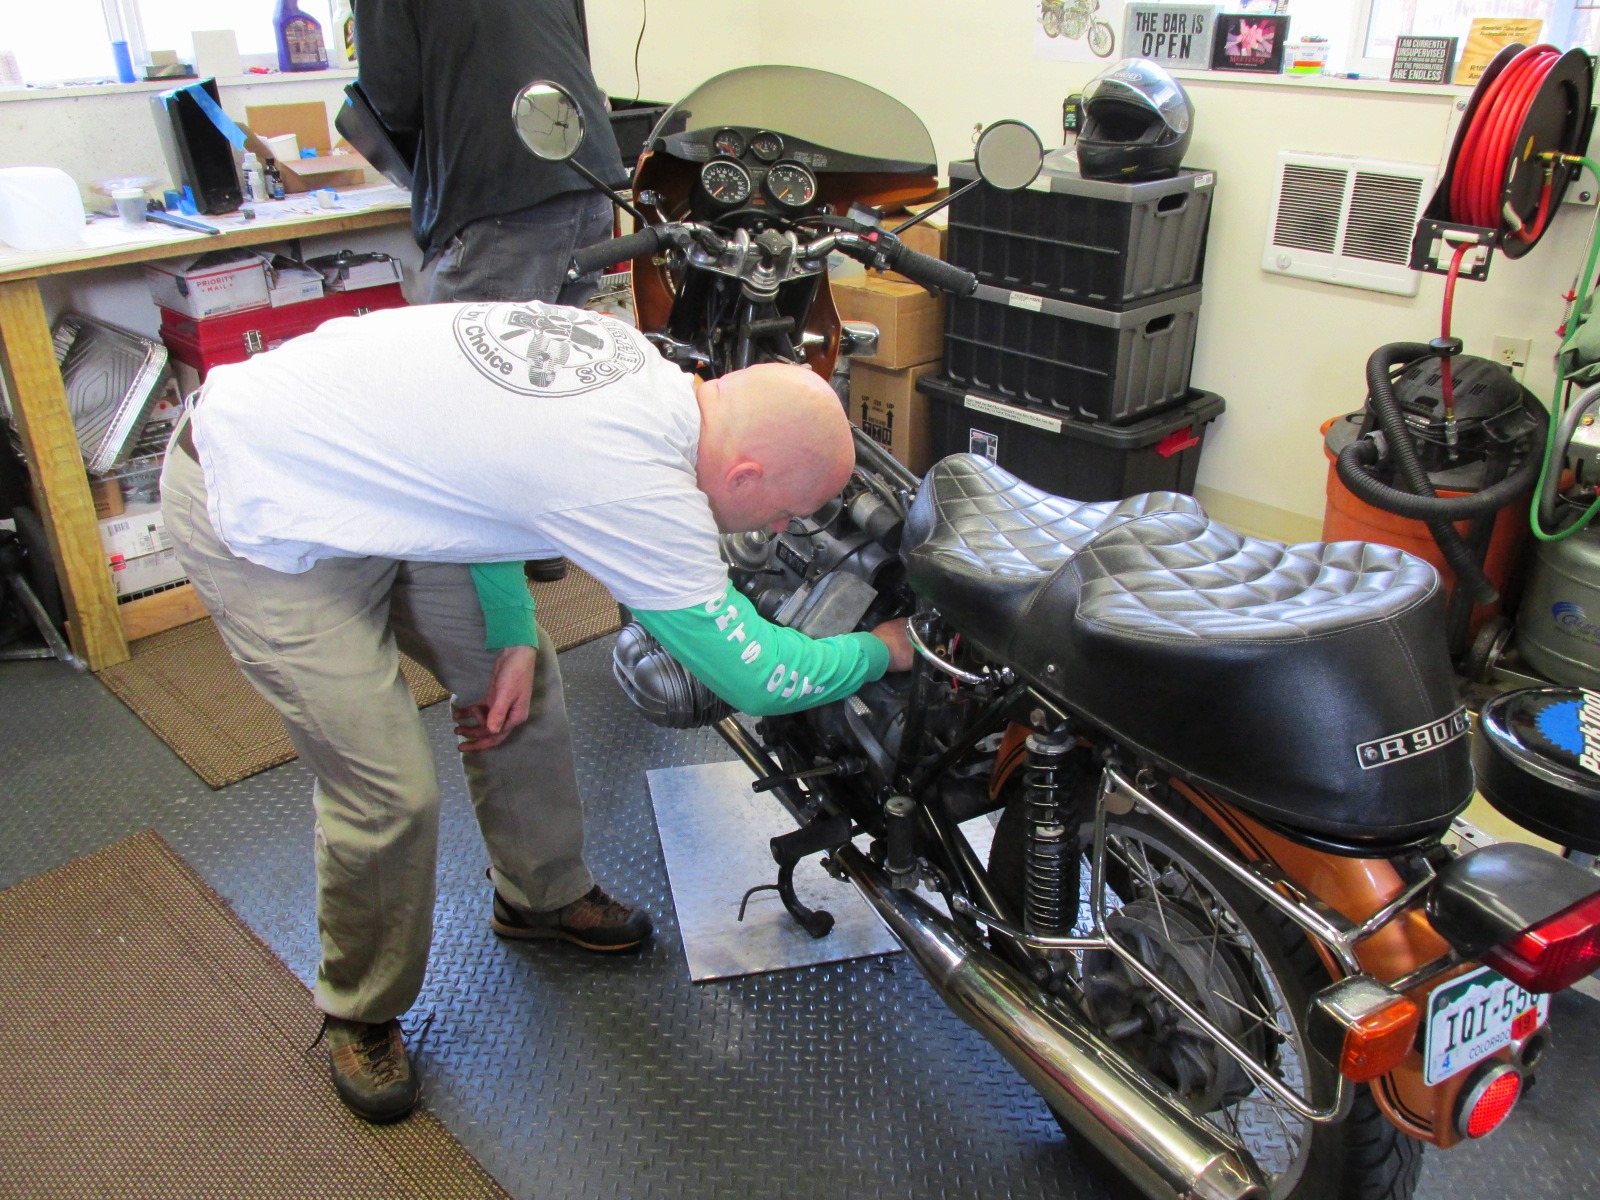
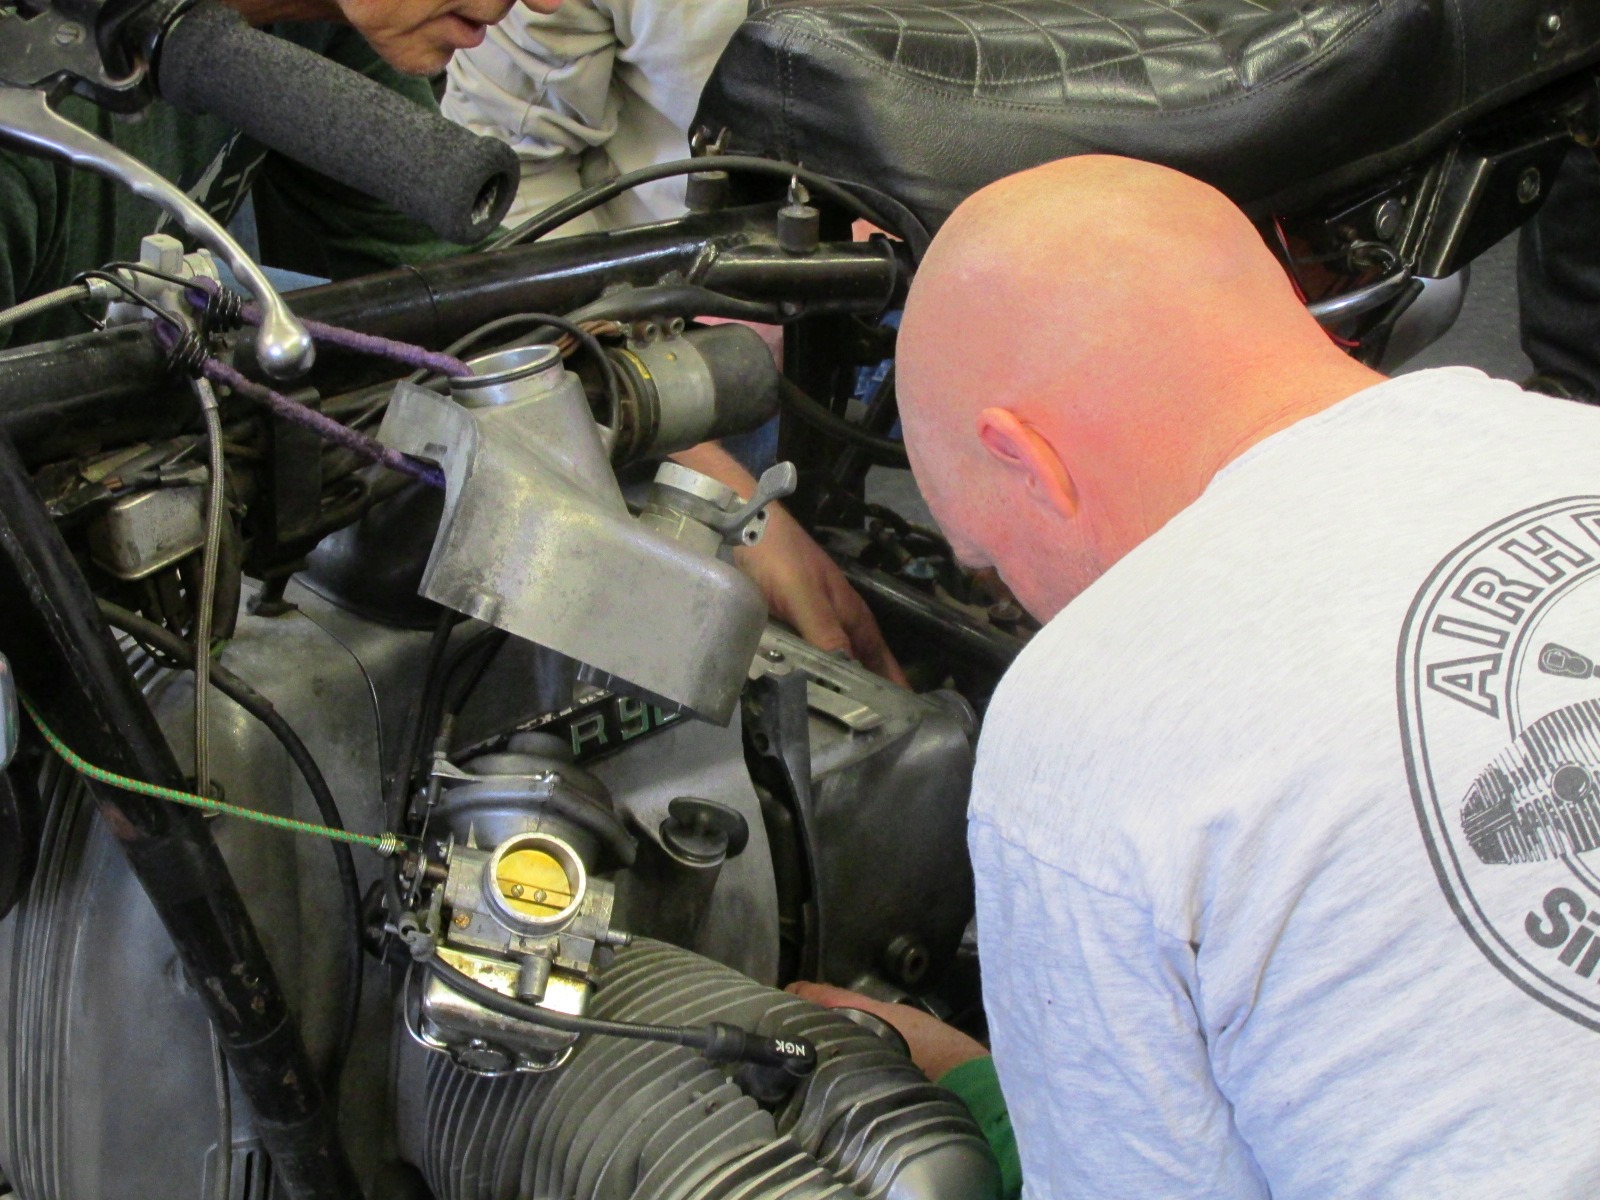
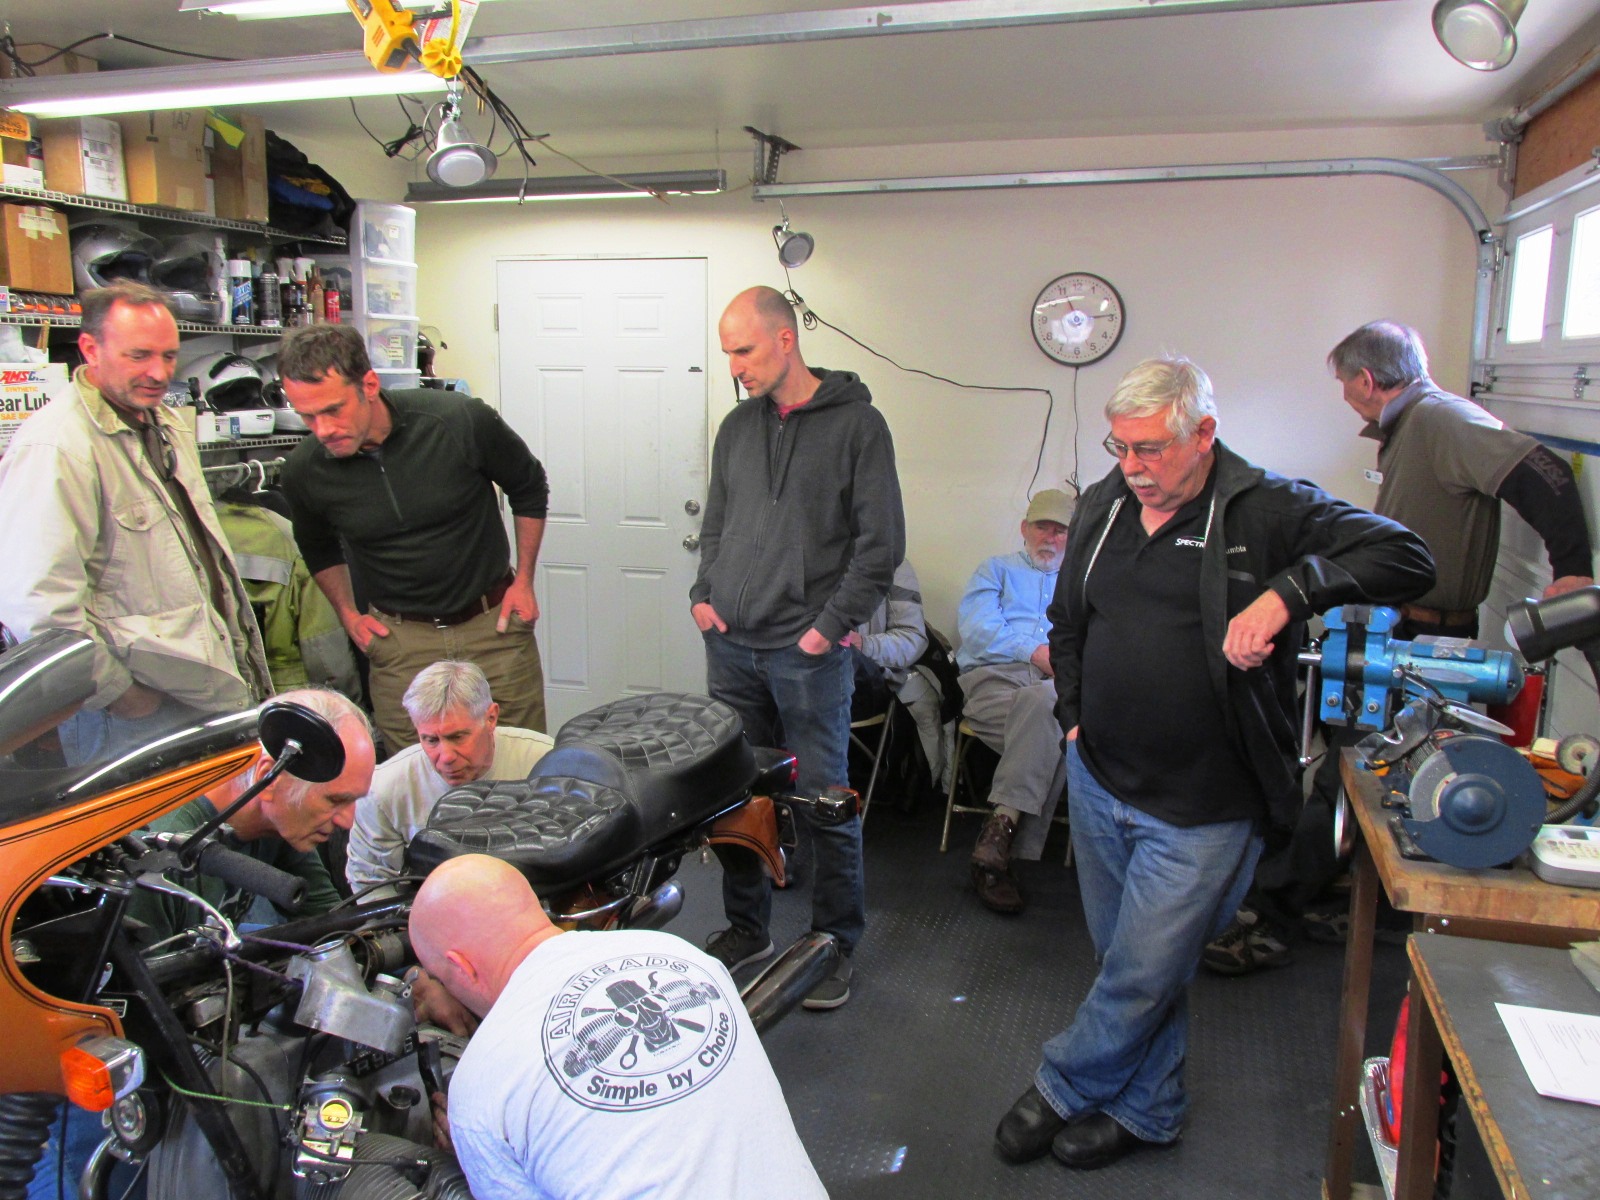
Last Saturday, one of our members, Chris, brought his 1974 R90/6 in so he can learn-by-doing. We had about 10 others come to lend a hand, kibitz and hang around with like-minded folks.

I wrote up a check list for Chris on how to do this work.

Transmission Spline Lube & Swing Arm Bearing Replacement

Transmission Removal, Lube, Install

  1. Remove air intake tubes and carburetors (leave cables on carbs).
  2. Remove air box clam shells and air filter (leave choke lever connected)
  3. Remove battery
  4. Remove battery box
  5. Remove drive shaft bolts (4)
  6. Remove luggage rack (if attached)
  7. Remove rear brake rod
  8. Remove rear wheel
  9. Remove shocks (not needed if all you do is a spline lub)
  10. Remove drive shaft front nuts (4)
  11. Remove swing arm pivot pins
  12. Remove swing arm
  13. Remove transmission bolts (3) and nut (1)
  14. Slide transmission off splines (protect frame tubes from scrapes)
  15. Inspect & clean splines
  16. Lube splines with Honda Moly 60 paste (or Honda Moly 77 paste)
  17. Slide transmission back on splines
  18. Attach transmission bolts (3) and nut (1) & torque

Swing Arm Bearings Removal

  1. Remove dust caps
  2. Remove inner bearing race
    1. Inspect for brineling to outer race and/or damage to inner race
    2. Replace if necessary
  3. If replacing swing arm bearings, pull outer races with Cycle Works bearing puller.
  4. Install new outer races with Cycle Works tool
  5. Pack inner bearing race with red LP-2 grease
  6. Install inner bearing race
  7. Install dust cover

Swing Arm Installation

  1. Install swing arm pivot pins
  2. Install drive shaft bolts (4) to transmission output coupling
  3. Center swing arm
  4. Torque swing arm pivots and lock nuts
  5. Recheck swing arm is centered

Final Assembly

  1. Inspect rear drive splines. Clean and lube with Honda Moly 60 or Moly 77 paste.
  2. Install rear drive on swing arm with new gasket and (4) bolts and washers and torque
  3. Install shocks and torque
  4. Install luggage rack (if used)
  5. Install rear wheel and torque nut
  6. Install rear brake rod and adjust rear brake
  7. Install battery box
  8. Install battery
  9. Install air box filter and clam shells
  10. Install carburetors and inlet air tubes

It took about 6 hours to complete this work including a pizza lunch and the general banter that takes the place of wrench twisting at these gatherings.

1983 BMW R100RS Remove Rear Fender Assembly

I’m making progress on getting to where I can remove the electrical system. I finished taking off, and taking apart, the rear fender assembly that includes the license plate bracket with side reflectors, tail light housing, turn signals and stalk, the cowling tool box and the rear wiring sub-harness.

You can see what I found and how I did the work here.

Rear Tail Light, & Turn Signal Assembly, License Plate Bracket & Rubber Mud Flap

Rear Tail Light, & Turn Signal Assembly, License Plate Bracket & Rubber Mud Flap

Tail Light Reflector Wiring Detail

Tail Light Reflector Wiring Detail

Rear Wiring Sub-Harness Plug Location

Rear Wiring Sub-Harness Plug Location

Rear Fender Assembly Removed

Rear Fender Assembly Removed

1983 BMW R100RS Remove Tank, Seat & Fairing

Due to the blizzard in Denver yesterday, I had time to finish up some documentation on the project so far and post it to my site. The focus has been on the fairing disassembly and a catalog of the fairing mounting hardware and where it goes. I found existing parts fiche aren’t very helpful about what fasteners go where.

Here is a link to two new publications.

52 BMW 1983 R100RS Remove Seat and Seat Cowling
46 BMW 1983 R100RS Remove Fairing, Dash, Volt Meter, Clock, Ignition Switch

I included a couple videos, one of which shows details of how all the fairing panels are connected.

Here is how the bike looks now.

Tank, Seat, Fairing & Brackets Removed

Tank, Seat, Fairing & Brackets Removed

And the stack of bins the parts are going in, which will increase as I get down to the frame.

Bins for Disassembled Bike Parts

Bins for Disassembled Bike Parts

1983 BMW R100RS Project Restart; A New Direction

I bought a 1983 R100RS in January 2015 just before I retired so I would have a project to work on. At that time, this was to be the RS I always wanted. I fell in love with the RS the first time I saw one in 1977, so what better way to kickoff my new retired life than to own one and restore it.

In 2015, I corrected several problems and did some needed work:

  • Fixed a flickering oil pressure light
  • Fixed a flickering charge indicator light
  • Rebuilt and refinished the carburetors
  • Replaced the alternator brushes
  • Replaced the broken rubber diode board mounts with metal ones along with the diode board
  • Fixed all the cracks in the panniers and welded the broken pannier frame weld.

After that work, I rode the bike for a few months and several hundred miles and had every intent of finishing the rebuild when winter came. But, I got side tracked with some needed refresh work on my 1975 R75/6. And then in early 2016, someone put a first year, 1977 R100RS up for sale. Long story short, I bought it. And then I decided to restore it so I could ride it to the 40th R100RS anniversary rally in Pennsylvania in September, 2017.  I posted a couple blogs about that ride and was asked to publish three articles about the build and the ride in the BMW MOA magazine. Of course, I published a lot of documentation about that build here:

So, it’s now March 1, 2019 and I’m ready to restart the build of the 1983 RS. But, I changed direction from restoring it to doing a resto-mod and converting it into an RT. I refer to this as the R100RS/T build project.

I revised my original build plan to reflect the new end-state and I added a video walk-around of the beginning condition of the bike. It’s a whole lot cleaner than when I brought it home in 2015.

I plan to make a number of modifications to improve performance, handling and appearance beyond the conversion from an RS to an RT, I summarized what my plan is in the updated build plan you can find here:

As on all my projects, I’ll continue to add links to how I did various parts of the project to this project build index:

So, stay tuned.

Availability of Airhead Electrical System Documentation

I have been developing a growing library of airhead electrical system documents.  So far I’ve written documents that cover the /5 and /6 1975-76 electrical systems.

For each, I document the wiring system, circuit by circuit, with explanations of what goes where and with notes about well know problems. Another document describes how the electrical components work. I also wrote an Electrical System Basics document to help those who, like I was, are mystified about electricity and how it is applied to our airhead motorcycles.

I’ve been working on these documents off and on for the past two years and figured they might be helpful. You can find them using this link and they are listed on the right hand set of links on most pages.

I hope to add additional documents covering the 1977 RS and possibly the 1983 RS as I have both of those, have completely rebuilt the ’77RS and plan to do the same for ’83 RS soon.

I see more and more questions about electrical system problems, and I expect this to increase as these bikes get older. Many folks struggle with electrical wiring diagrams and don’t have a good understanding of how the electrical components work. So they are at a loss about how to proceed with fault isolation and problem solving. I found that writing this material helped me learn much more about the electrical system and improved by diagnostic capabilities. That’s one reason I wrote these documents; writing things down really helps me learn.

I’ve digested a lot of material others published, among them are Bob Fleischer, Duane Auscherman, Anton Largiader, Tom Cutter and many of the questions and answers that have appeared in the various airhead forums including the micapeak airhead news group and the BMW MOA airhead forum. To all of you, thanks for sharing your knowledge.

I hope this material is helpful.  Have a great New Year.